Synology Storage Manager
After you have installed your DSM, many people start using their DiskStations without realizing that maintenance should also be done regularly. Settings everybody should have configured to reduce maintenance, increase lifespan and protect their data. This post will guide you through the Synology Storage Manager, where we will configure auto data scrubbing and performance.
Please read my post about installing DSM. If you’d like to know how to configure a storage pool and volume how to configure a storage pool and volume, please read my post about installing DSM.
Configure storage pool and volume
In this post, I will focus on the post-configuration process within the Synology Storage Manager when you have created a storage pool and volume or have a storage pool and volume running for a while. I will focus on the different settings not activated by default, which are essential for an optimal running NAS.
Data Scrubbing
What is data scrubbing?
Over time, data in a storage pool can become incorrect or incomplete. Data is stored over multiple disks, and every disk contains information to repair a faulty disk. Moreover, data scrubbing is the process that amends or removes data in a storage pool that has become incorrect or incomplete. The data scrubbing process also ensures that the data on each disk required to repair faulty disks is correct and up to date.
Availability
You can use data scrubbing when you meet the following criteria:
- The volume file system must be BTRFS or storage pools of the following types:
SHR,SHR-2,RAID-5,RAID-6, orRAID-F1. Advanced data integritymust be activated on aShared Folderto work. Data scrubbing will run successfully; if this is not enabled. However, it will not be able to repair data because of a lack of checksums.
More information about data scrubbing is available in the Synology Knowledge Center.
Setup auto data scrubbing
To protect your data, you should perform data scrubbing on your storage pool/volume, but we’re not going to be reminded to perform this action. At least we like our NAS to run and always be available with as little maintenance as possible. However, thankfully Synology comes with the ability to have it perform data scrubbing based on a schedule. Exactly what we need.
- Login to your DSM as administrator
- Open
Storage Manager - Select your
Storage Poolon the left - Click
Schedule Data Scrubbingat the top
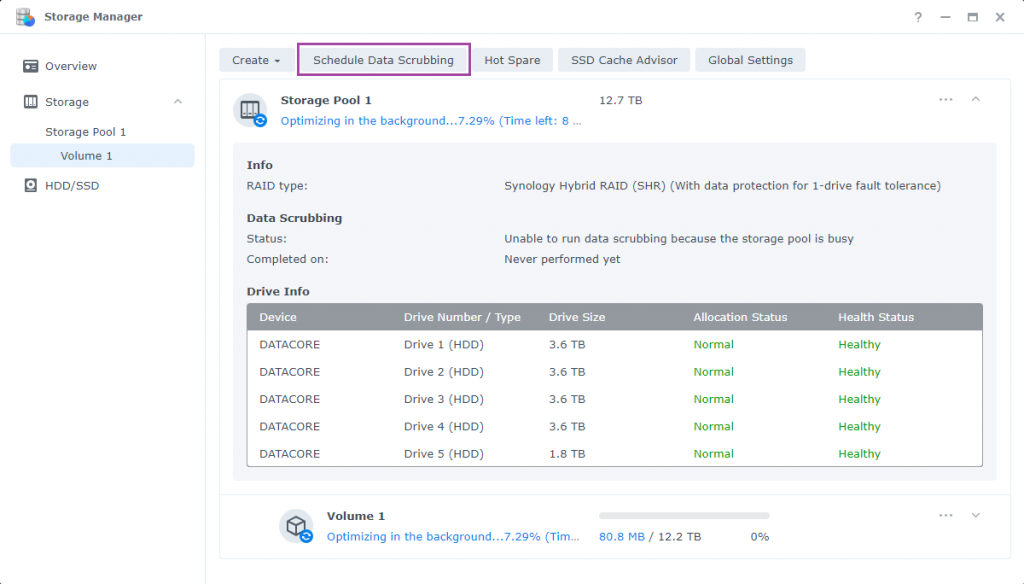
- Tick the checkbox
Enable data scrubbing schedule - Select the
Storage Pool(s) you want to apply this schedule for - Next select frequency. While the default is every six months, I recommend a three-month interval at maximum.
Frequency
I have over a decade of experience with Synology DiskStations and have experienced multiple drive failures.
I always follow the following rule of thumb. When you use your DiskStation for business or essential private data, perform data scrubbing every month. Furthermore, suppose you operate your DiskStation in a private environment and have crucial data backup-upped to an off-site Synology or use a package like Cloud Sync, Hyper Backup, or others. In that case, I recommend performing data scrubbing every three months.

- By default, data scrubbing runs at any time. Data scrubbing has quite an impact on the performance of your Synology. I think you should use this setting to ensure that your Synology performs data scrubbing at moments when you are not using it. Preferably at night.
Run data scrubbing only during specific periods
When you tick the checkbox Run data scrubbing only during specific periods, a pop-up will be displayed. With the two buttons highlighted in the screenshot below, you can turn on/off certain time blocks. When selecting the blue blocks is the time that data scrubbing will run.
At the scheduled time, data scrubbing will run. However, when it fails to complete within the allocated time, it will automatically be paused and continue when it’s allowed again.
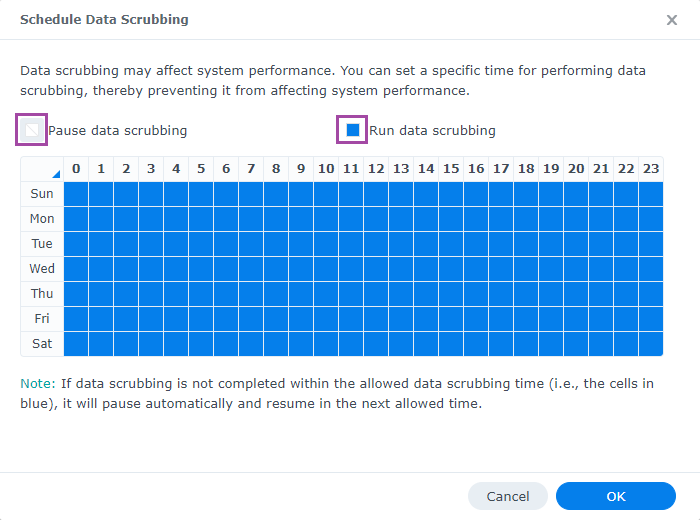
Click OK to save the time schedule.
- Click
Saveto schedule your auto data scrubbing.
Space Reclamation Schedule
When using the BTRFS (pronounced: Better-FS) file system, the system needs time to reclaim its space after deleting a shared folder, snapshot, or LUN. This can impact system performance. To limit the impact of the system performance when the Synology DiskStation is in use, you can restrict the space reclamation to run only during specific time slots.
This can be achieved with the Space Reclamation Schedule.
- Login to your DSM as administrator
- Open
Storage Manager - Select your
Storage Poolon the left - Open
Global Settings - Click on
Set Time Gridwithin theSpace Reclamation Schedulesection
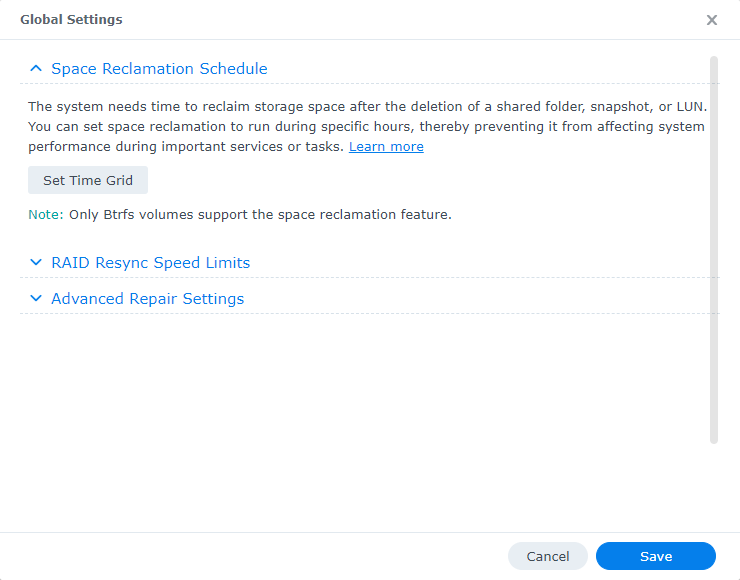
- Define schedule and click
OKto save it.
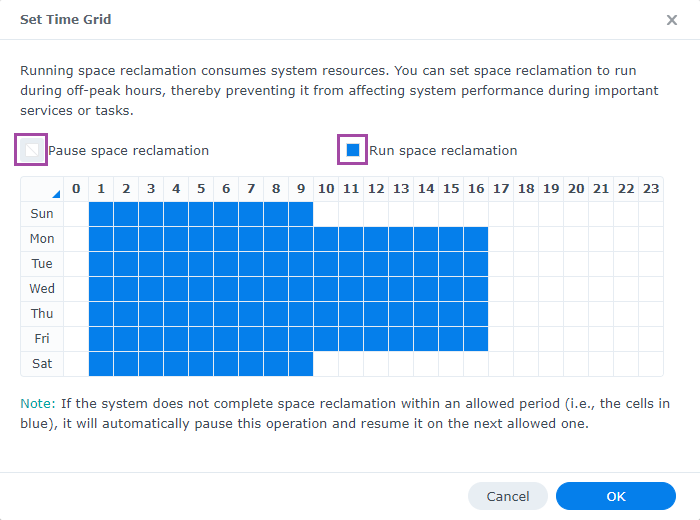
- Click
Saveto save the changes to theGlobal Settings
RAID Resync Performance
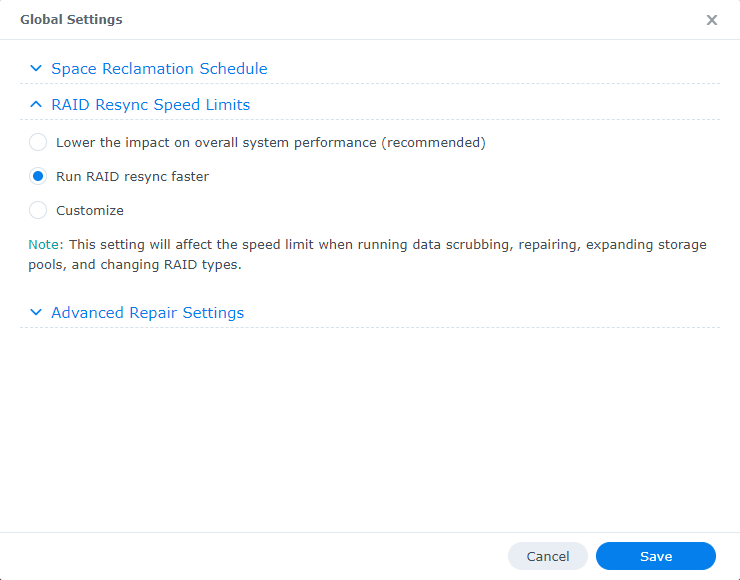
Operations on your storage volume, like data scrubbing, repairing after a disk failure, resizing, or even changing RAID type, will significantly impact system performance. However, some of these tasks must finish as quickly as possible. By default, Synology configures this to have a low impact on the system performance. That is, of course, a logical choice. However, when there is a disk failure. We need to repair the volume as soon as possible.
Change RAID resync speed
- Login to your DSM as administrator
- Open
Storage Manager - Select your
Storage Poolon the left - Open
Global Settings - Open the section
RAID Resync Speed Limits - Change
RAID Resync SpeedtoRun RAID resync faster - Click
Saveto save the changes
Conclusion
I hope this helps you configure some basic settings within your Synology Storage Manager. This will help you reduce maintenance and improve your Synology DiskStation against data loss and RAID resync performance. As always, please comment or email me your thoughts and ideas for articles.


